Saturday, June 2, 2012

Split Pea Soup

3 posts in one week? I know. Very surprising. Now before I disappear for another 6 months, I wanted to post about split pea soup. It's green. It can be gross looking. It reminds me of "The Exorcist." However, I recently tried it for the first time, and I loved the flavor! The following recipe contains chunks of ham, carrots, celery, and onions to make it a bit heartier. The best part about it? It's a slow-cooker recipe, so all you have to do is layer the ingredients in your cooker, set it on low, take an 8 hour nap (or 4-5 hours if you set the cooker on high), wake up, and eat. Amazing.


 This recipe comes from Diana Rattray over at About.com (this recipe came up when I googled split pea soup). The original recipe is here, but I made a few changes based on what was available in my kitchen, and personal preferences. 

Slow Cooker Split Pea Soup, adapted from Diana Rattray's recipe
  • 1 (16 oz.) pkg. dried green split peas, rinsed
  • 2-3 cups diced ham (I like more ham, because it adds heft)
  • 3 carrots, peeled and sliced
  • 1/2 cup chopped onion
  • 2 ribs of celery plus leaves, chopped
  • 3 or 4 cloves of garlic, minced
  • 1 bay leaf
  • 1 tbsp. salt (or to taste)
  • 1/2 tsp. fresh pepper
  • 1 1/2 qts. hot water
  • 1 15 oz. can sweet peas, with juice (orig. doesn't call for this, but I like the extra sweetness and heartiness it adds)
Preparation:
Layer ingredients in slow cooker in the order given; pour in water. Do not stir ingredients. Cover and cook on HIGH 4 to 5 hours or on low 8 to 10 hours until peas are very soft.. Remove bay leaf. Mash peas to thicken more, if desired. Serve garnished with croutons, or with a side of crusty bread.


Friday, June 1, 2012

How to Cook Bacon

Bacon. It goes great with eggs for breakfast, in a BLT (or BLTA--bacon lettuce tomato with avocado) for lunch, or a cheddar bacon onion tart for dinner. It. Is. Awesome. 


Bacon seems to take very little thought as far as the cooking process goes. Heat skillet, put bacon in skillet, cook until brown. My problem with bacon though, is that I would frequently over-cook it in my quest for crispiness. So often, it would look like this: 
Artist's rendering

See how burnt bacon makes me sad? Then, America's Test Kitchen (ATK), my favorite show and cooking guide, came out with a video called, "Make the Most Perfect Bacon Ever." Ever? Pretty much.


Over high heat, place bacon in skillet, and then cover with enough water to cover. When water boils, turn heat down to medium.

Once water simmers and evaporates, turn heat to medium-low. Cook until crispy and brown.

Crispity, crunchity, bacony.
It seems counter-intuitive to add water for crispy bacon, and I was hesitant about the process. However, ATK has never done me wrong, and I'm happy to report that it worked! 

Edit: My cousin asked if the water method would reduce the flavor of the bacon (it does not), and mentioned that she just cooks bacon in the oven. Though I agree that baking in the oven works great, I don't always want to heat up my oven to cook a few strips of bacon. If I were cooking for a large group, then the oven method would work best. For 3 strips of bacon, I would recommend this water & skillet method.

Here's ATK's video explaining the process...

Monday, May 28, 2012

Buttermilk Chocolate Cookies

It has been a very, very long time since my last post. Rather than discuss why I've been absent for so long, let's instead celebrate my first post of 2012. Yay!!!

Let's also celebrate these cookies:
Buttermilk Chocolate Cookies
  These buttermilk chocolate cookies were so easy to make, and super tasty. Melted butter, and my addition of brown sugar added chewiness to the texture of the cookie. If you don't have buttermilk, remember that you can make sour milk by replacing 1-2 tsp of milk with equal amount of vinegar/lemon juice.


Recipe (adapted from Baking Bites' version; my changes are in parentheses):
2 cups all purpose flour
1/2 tsp baking soda
1/2 tsp salt
1/2 cup butter
3/4 cup cocoa powder
 2 cups sugar (I did 1 cup white, 1 cup light brown sugar)
1 tsp vanilla extract
2/3 cup buttermilk (I used sour milk)
2 cups chocolate chips (I did 1 cup bittersweet chips & 1 cup white chips)

Preheat the oven to 350F. Line a baking sheet with parchment paper.
In a medium bowl, whisk together flour, baking soda and salt.
Melt the butter in a small, microwave safe bowl.
In a large bowl, combine the melted butter (still warm) with cocoa powder and whisk until very smooth. Whisk in sugar, vanilla extract and buttermilk. Gradually stir in the flour mixture until no streaks of flour remain. Stir in the chocolate chips.
Drop dough in 1-inch balls into prepared baking sheet, leaving about two inches between cookies to allow for spread.
Bake for 10-12 minutes, until cookies are set around the edges.
Cool for 2-3 minutes on a baking sheet, then transfer to a wire rack with a spatula to cool completely.
Makes about 4 dozen cookies.


Saturday, December 31, 2011

Banana buttermilk cupcakes


Banana Buttermilk Cupcakes
This past week, our older sister and brother (plus his family) have been visiting from Tampa, FL. We have had amazing food. In addition to my sister's famous gumbo, we've enjoyed German food from Leavenworth, WA, some vendor foods from Pike's Place Market in Seattle, and various foods from the International District in Seattle. I don't think I've been hungry since Christmas Day, but I haven't stopped eating since then. Plus, I've barely cooked!

Tomorrow for New Year's Eve, I plan on making a Nutella Brownie Pie, but my siblings also requested a cake for tonight's dessert. "You're always posting photos of cakes on Facebook, but you haven't made us any dessert yet!" Wah, wah, wahhhh. Wanting to try something a little different, I thought of a cake that my friend Celia wrote about over at her blog, The Adventures of Cecelia Bedelia. Coincidentally, I had some ripe bananas sitting on the counter. Kismet.

Fresh out of the oven. Simmer down now! (SNL reference. Anyone?)
Though it is a tiny bit denser than a regular cake, these cupcakes are not like the texture of banana bread. They were super moist and sooooo tasty. I topped them with cream cheese frosting and walnuts, which elevated their level from delicious to "punch a baby in the face" scrumptious. I ate two cupcakes. TWO. I should be ashamed, but I'm just too darned happy with these little cakes! 

Tomorrow's dinner includes: roast turkey with sausage stuffing and gravy, prime rib with mashed potatoes and green bean casserole, steamed lobster, roasted oysters, strawberry rhubarb pie, and Nutella brownie pie. Then death from overeating. Next week, I will only eat chao/lugaw/rice porridge.

Happy New Year! Many blessings to you.


Sunday, December 18, 2011

Peppermint Ice Cream Cake

Hello there! My first semester of seminary is over! After finals yesterday, I cried a little (a lot), and had a long shower (tall drink), and am feeling much better today!

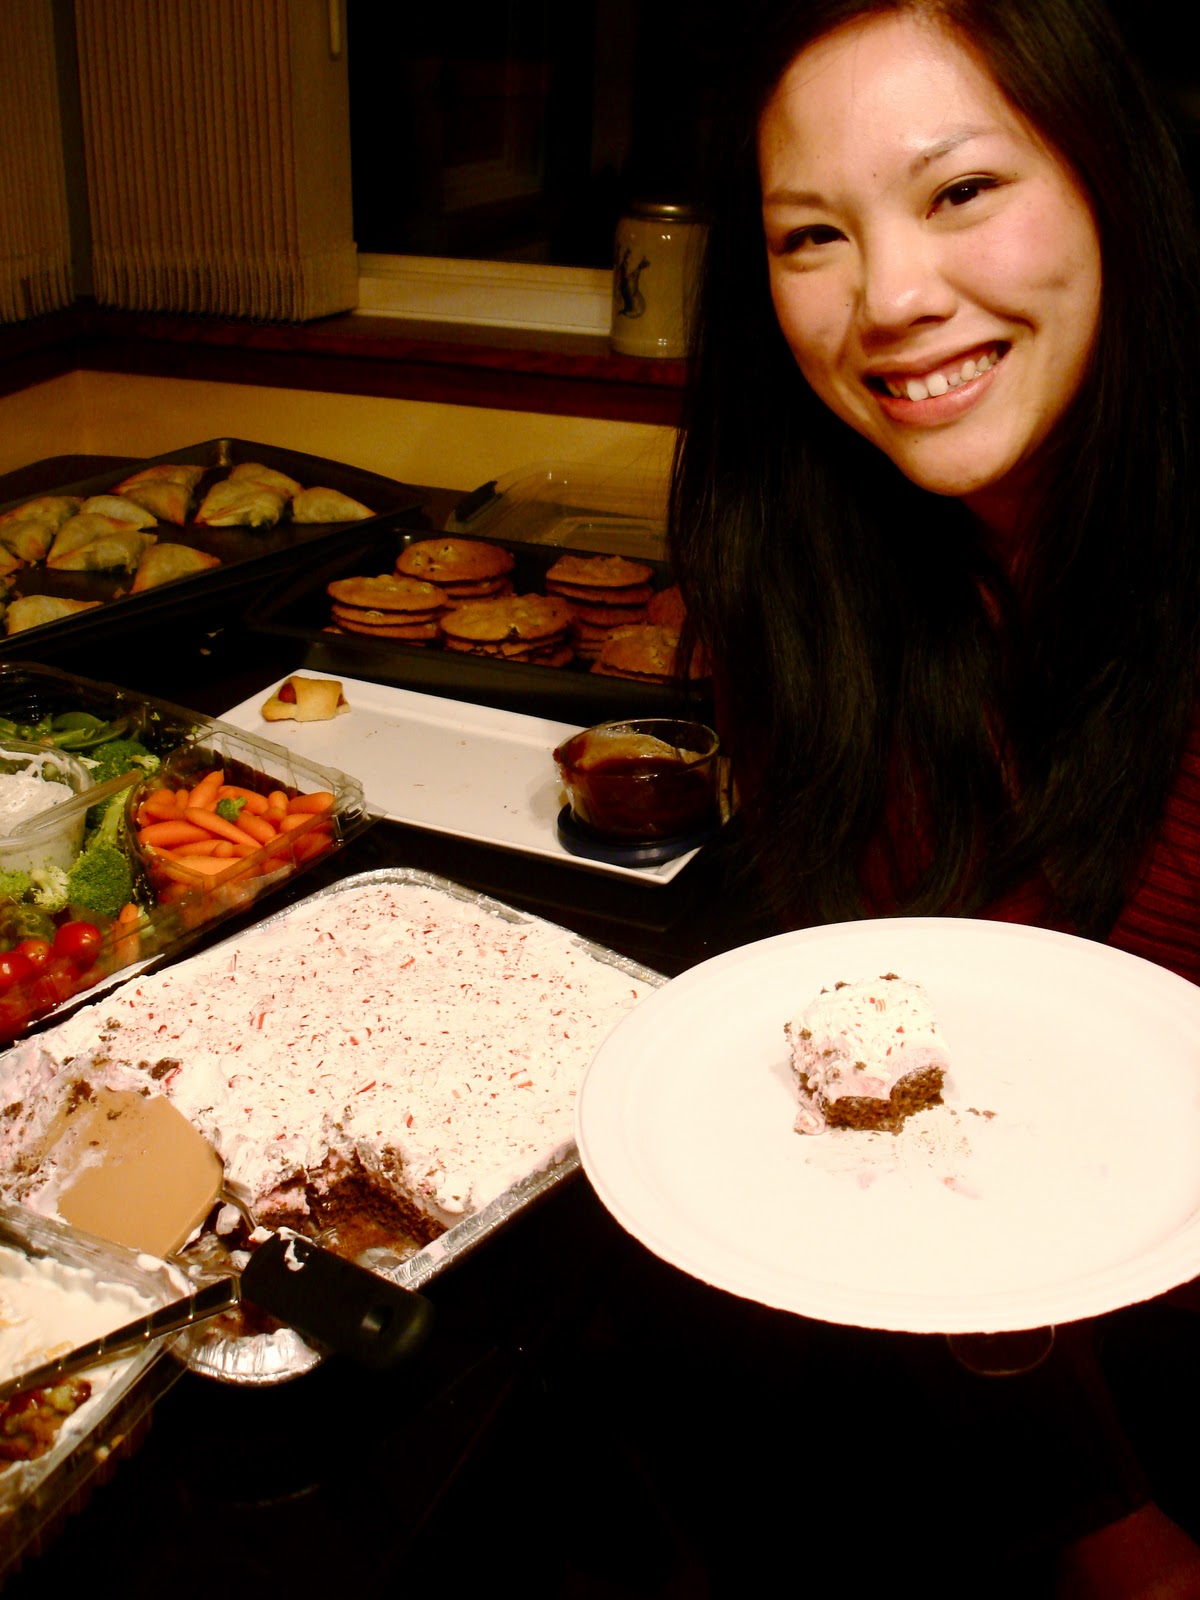
Peppermint Ice Cream Cake. Photo: Elizabeth P.


Last week, two of my friends threw a Christmas/White Elephant party. Along with a white elephant gift, we were asked to either bring a drink/cocktail or food. I brought sorbet & champagne cocktails and a peppermint ice cream cake.


First, I'd just like to say that Martha Stewart's SORBET & CHAMPAGNE COCKTAILS ARE MY NEW FAVORITE DRINK. Also, I am sorry to say that I don't have a photo of one from the party to post here. We happily drank them up, and didn't think to photograph it. It's super easy to make, though. Literally, you spoon some sorbet into a glass (we used raspberry sorbet), and then fill the glass with champagne. The next morning, I received a text from my friend, "Girl! Those champagne cocktails did me in!!!" I think that's the best review it could possibly get.


The makings of a peppermint ice cream cake
The peppermint ice cream cake was also incredibly easy to make, and I think everyone enjoyed it. At least, I really enjoyed making and eating it. It had soft chocolate cake, layered with minty ice cream, whipped topping, and crunchy candy cake sprinkles. It's a great seasonal dessert, and can be adjusted with different ice cream flavors, depending on your preference or the season.

Look at all that food in the background! Yet, only the pigs in a blanket are gone. Photo: Elizabeth P.

Chau's Super Easy Peppermint Ice Cream Cake 
(Makes one 9x13 cake)

1 box chocolate/devil's food cake mix, divided
eggs, oil, and water called for in the cake recipe (I substitute coffee for water to enhance choco flavor)
1 container of peppermint ice cream (1 container usually has 1.5 qts)
1 - 8 oz of your favorite whipped topping (I was lazy, I used Cool Whip)
3 candy canes or a bunch of peppermint candies, crushed to make "sprinkles"
1 - 9x13 pan
nonstick spray

  1. Preheat oven according to cake mix directions. I was using a shiny aluminum pan, so I reduced oven heat by 25 degrees Farenheit.
  2. Do your best to divide the dry cake mix in half. (About 1 3/4 c. from 18 oz box of mix).
  3. For the eggs, oil, and water/coffee, here's how I broke it down: 2 eggs (my cake mix recipe called for 3 eggs for full cake); half the amount of oil (half of 1/3 c. for me); a little less than half of the amount of liquid called (a full cake mix called for 1 1/4 c, so I used 1/2 c. for the half cake. Remember, you have 2 eggs, so it's okay to use less than half the liquid).
  4.  Mix it all together! 
  5. Pour it in the pan sprayed with nonstick spray! 
  6. Bake it for about 10-15 min, or until an inserted toothpick comes out clean!
  7. Once fully baked, allow cake to cool for 1-2 hours, until fully cooled. 
  8. After cake has cooled, let ice cream sit on counter to soften (about 20 min). You'll know it's soft when you can use a spoon or spatula to mix the ice cream. NOTE: If you can't find peppermint ice cream, you could mix crushed candy canes into softened vanilla ice cream.
  9. Remember, cake should be cooled. Spoon ice cream onto the cake, and spread it out evenly over the cake. 
  10. Top with whipped topping and crushed candy canes/peppermint candies. Freeze for about 1-2 hours.
  11. Eat that jank.


Monday, November 28, 2011

Nutella Brownie Pie, revisited

Since my initial post about Nutella Brownie pie, I've made it again twice. Once for a church pie auction (it sold for $85!), and recently for a friend's birthday party.

Ding dang delicious.

The previous recipe I had was fine. However, I've made some changes that I think might improve your pie making experience.

Nutella Brownie Pie (revised)
1 pie crust, 9 inches (Whatever pie crust you use is fine. I recently used a store bought graham cracker crust that saved time, and tasted great with the filling)
2 batches of Nutella brownie recipe by Abby Dodge (3 batches took a longer cooking time, and the edges of the pie tended to overcook. Still delicious, but 2 batch maximum is best.)
Top with whipped cream, whipped topping, or Dream Whip. Lots of it.
  1. If making your own, prepare the crust ahead of time.
  2. Preheat your oven to 350 degrees F.
  3. Make the batter by whisking eggs and Nutella in a bowl until smooth.
  4. Add flour, and whisk until blended.
  5. Pour batter into your pie crust. Bake for 20-30 min. You don't want to thoroughly cook this pie, so that it gets soft, gooey, and fudgy in the middle. Place on cooling rack.
  6. After pie has cooled for about 2 hours, top with whipped cream. (Just make sure the pie is not warm so that the cream doesn't melt!)
  7. You can also melt a tbsp of Nutella with 1/4 of chocolate chips in a Ziploc sandwich bag, snip a small corner of the bag, and then drizzle melted chocolate on top of the whipped cream. 
  8. Note: To make this even more chocolate-y, add chocolate chips to the batter.
 The holidays are here, so that provides a good excuse for you to make this pie...Not that you really need an excuse to try this!

Sunday, November 20, 2011

Update on Thanksgiving Recipes

A few days ago, I posted about these pumpkin cakes for Thanksgiving. Since we're having a potluck at church on Sunday, I decided to try them both. Here are the results: I definitely recommend the pumpkin gooey cake. It's got great flavor and texture. If you like a super moist, very dense pumpkin bread, then you'll also enjoy the pumpkin spice cake. 

Makeover Pumpkin Gooey Cake      

I hate pumpkin pie, and don't usually like pumpkin flavored things, but this pumpkin gooey cake is delicious. It's baked just until the middle sets a bit, or the edges brown, and then you're done. It has a buttery, almost custard-like pumpkin layer, but it's not dense. It's light and fluffy, even though it's soft. The cream cheese is a nice counterpoint to the pumpkin flavor. Also, make sure to use cinnamon AND nutmeg
 

Things I did differently from the recipe: 
  • store was out of reduced fat cream cheese, so I used regular
  • regular butter instead of 1/2 fat butter
  • 2 1/2 cups of confectioner's sugar seems plenty (remember that the 2nd cake layer is also sweet)
  • I didn't have yellow cake mix, so I used carrot cake mix. The spices in it went well with the pumpkin layer!
  • 3 whole eggs instead of 2 whole + 2 egg whites
  • If you're using an aluminum pan, reduce oven temp to 325 degrees F
Pumpkin Spice Cake
I thought that I would enjoy this pumpkin spice cake more than the pumpkin gooey cake, but compared to the other cake, it's a bit underwhelming. The flavor is good...there's a nice balance of cocoa, cinnamon, and nutmeg. However, when I cut into the cake, it was super dense. Chocolate chips provide texture variation compared to the density of the cake, though I think the addition of walnuts would have helped more.


Things I did differently from the recipe:
  • instead of 1 1/2 cups sugar, add 1 c. white sugar + 1/2 c. brown sugar
  • 3 whole eggs instead of 2 eggs + 2 egg whites
  • omitted allspice and cloves (don't have it!), added more cinnamon and sugar
  • omit 1/2 cup raisins
  • added 1/2 cup chocolate chips instead of 1/4 cup mini chocolate chips (be sure to coat chips in flour so they don't sink in the batter)
  • substituted 1/2 buttermilk with 1/2 sour milk
  • substituted 1/3 cup water with 1/3 cup sour milk
 Reading the reviews of the recipe, it seems that I'm not the only one whose cake was dense. So maybe it's supposed to be that way? It could be under-baked, but I'm afraid of how brown the outside might look had I baked it longer. Anyway, it has wonderful flavor, but I wouldn't call it a cake. It might make more sense to call it a dense pumpkin bread...But what's worse? Super dense or super dry cake?

Happy Thanksgiving!